 Loading... Please wait...
- Home
- Tech Information
- Cartridge Installation
Cartridge Installation
New Products
-
Copy of MXT National Shock 85cc 2025+ $2,200.00
-
MXT National Shock 85cc 2017-2024 $2,200.00
-
MXT Billet Lug Kit $969.00
-
PREMIUM SETUP $6,939.00
Cartridge Installation
Setting the preload on a Blackjack or Raven cartridge:

Step #1: We are beginning with the fork tubes assembled and already cleaned, serviced, and rebuilt. Compress the outer fork tube down fully.
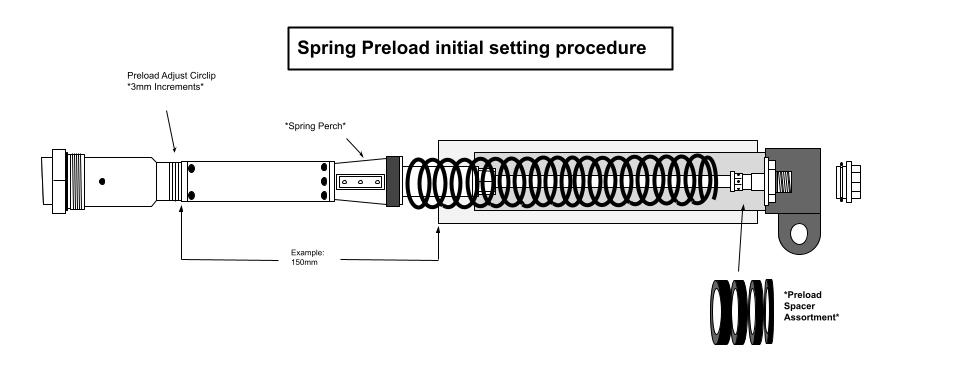
Start with the cartridge preload clip in the middle position. Insert any number and/or size of the supplied assorted preload spacers. Next insert the fork spring, and then insert the fork cartridge assembly.
The fork cartridge should rest lightly against the top of the spring, no force should be applied. If the cartridge bottom adjuster hits the inside of the fork lug before the cartridge spring perch contacts the fork spring, this indicates that you can add more preload spacers below the spring. Or, you could lower the circlip position until the spring perch contacts the spring.
If you have contact between the spring perch and spring, take an initial reference measurement from the top of the fork outer tube, to the top of the spring perch tube, as shown in the picture above. As an example, the measurement is 150mm, remember and/or record this number.

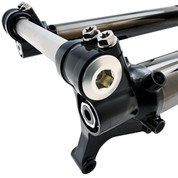
Step #2: Next the cartridge needs to be secured properly into the fork lug. You will have to push lightly against some spring resistance while aligning the cartridge rebound adjuster to its proper position inside the lug and/or lug adapter. This picture shows the hardware that is used on our Raven and Blackjack for a 2017-2020 WP AER forks. Other model and/or brands of forks will have different cartridge bottom rebound adjusters and bottom nuts, but the preload setting process remains the same regardless.
Once the cartridge bottom adjuster is aligned properly and you are applying some pressure against the spring force, install the bottom nut/hardware that is used to secure the fork into the lug. The cartridge should now be securely installed in the lug with some amount of tension against the fork spring. Verify that the fork outer tube is still pushed fully down on the inner tube, and in the same position when your first reference measurement was recorded.
Next, take another measurement using the same reference points as indicated in the drawing above. As an example the measurement is 145mm. If we subtract this number from our initial reference measurement, we get 5mm(150-145=5mm). This indicates that we have 5mm of spring preload being applied to the spring with the cartridge in its installed position.
From here you can make 3mm adjustments to spring preload by moving the circlip up or down at the top of the spring perch tube. If you end up near the top or bottom circlip position to obtain your desired preload, you could add or subtract preload spacers below the spring, and reposition the circlip closer to the middle position. The circlip does not need to be in the middle, the main goal is to obtain your specific desired preload value. It is helpful to have it end up somewhere near the middle so that quicker adjustments can be made if needed.
We supply and use different sizes of preload spacers because it allows for a wide range of spring lengths and configurations to be used. Many of our kits are supplied with a 450mm length spring. Let us assume that we used a 450mm length spring in this example, and had a 20mm,10mm,5mm, and 3mm preload spacers installed below it. If we were wanting 5mm of spring preload, we hit our mark with the circlip in the middle position, which is an ideal situation. Now let us consider if we did this same install, but had to use a 465mm length spring. We could install the 465mm length spring with only a 20mm and 3mm preload spacers, and end up with the same spring preload value of 5mm with the circlip in the same position. We have simply removed 15mm of preload spacers to adjust for the longer length spring. This scenario could apply to many different lengths, allowing for more flexibility in fork spring choices. This process remains the same even if the fork has been lowered or extended, only the number of preload spacers and/or sizes, and the circlip position would possibly change to obtain your desired starting fork spring preload.
INSTALLATION VIDEO:
This video is intended as an aid for installing the Raven cartridges in place of the AER system. If you need further guidance, email us, call the shop or reach out to your local professional suspension tuner for more help.


